

Lost Chapel |
|
|---|---|
 |
|
| Location | World Map |
| Sub-Areas | Chapel Basement, Cave |
| NPC's | Irabeth |
| Quests | A Blow from the Sky |
Lost Chapel is a Location in Pathfinder: Wrath of the Righteous. Lost Chapel can be found at World Map. A well-fortified chapel that was once a stronghold of faith in the good deities and a refuge for crusader forces. After it was abandoned, the chapel fell into ruin and became a den for monsters.
Lost Chapel Information
Your progression on this map is initially locked into a clockwise spiral heading in toward the chapel. Make your way along the road toward the chapel and you will encounter your companions and other NPCs:
- Ember and Daeran are a bit north of the crusader camp. You can have them join you or send them back to the crusader camp in the southwest - same goes for all the companions you meet along the way.
- Yaker, if you spared him at Reliable Redoubt and allowed the Hellknights to join the crusade, is to the north.
- Sosiel is to the northeast. Finding him will progress his companion quest A Veil of Silence and start a new quest, From a Dead Woman's Hands.
- Not far from Sosiel, you will meet a wounded crusader and some ghouls pretending to be corpses trying to ambush you. You must pass a Perception check to get the option to ambush the ghouls yourself and save the crusader.
- Further down the road, Regill and his armigers are fighting some gargoyles.
- Keep moving forward and you can save a crusader from the pile of bodies if you pass a Mobility check.
The gate of the chapel proper is guarded by several ghouls and a Kabriri Cultist. Outside the gate to the west you'll find another Kabriri Cultist and a succubus. Inside the chapel is a mini-boss encounter with a recently-turned Vissaliy Rathimus and other ghouls attempting to sacrifice some crusaders. If you previously persuaded Queen Galfrey to join the crusade, she will show up here to help. Defeat the ghouls and loot Amulet of Agile Fists +2 and a Shield of Magical Retribution +2.
If you kept the Wand of Zacharius from the caves of Leper's Smile, you can reveal an illusory wall that leads to the chapel basement. Here, you will find golems, specters, and Zacharius himself, a legendary hero of the crusade who turns out to be a lich imprisoned in this chapel. If you give him his wand, he will be freed and will promise to meet you again in the future, which unlocks the Lich mythic path. If you refuse to return his wand to him, you will need to fight him. This can be a very difficult battle.
Zacharius strategy:
- Helpful protective buffs include Protection from Evil or Chaos, the usual buffs to attack bonus and saving throws, and either Freedom of Movement (negates Mass Hold Person) or buffs to Will saves/compulsion effects (helps resist Mass Hold Person).
- Faerie Fire can negate the 50% miss chance from his Displacement buff.
- As a lich, he is vulnerable to positive energy. His Reflex save and Dexterity are both low, so he's very susceptible to spells like Grease and the Trip combat maneuver.
- Zacharius can be kited with some creative teamwork. If you have Haste, Enlarge Person, a glaive (or any other reach weapon) and some skellies, you can keep everyone away until he targets the skellies with his AoE spell, then rush your main damage dealer(s) in to do some damage until he's getting ready to use his AoE again. If he targets someone that's not a skelly (on harder difficulties), run for your life to get out of range before he casts, then once he does you can run back in.
Zacharius drops Dried Hand of the Martyr, Headband of Alluring Charisma +2, Amulet of Natural Armor +1, Ring of Protection +1, and Cloak of Resistance +1.
Captured crusaders can be found in the chapel graveyard. Pass a Stealth check and kill the ghoul tormentors to free them. Irabeth is in one of the rooms in the chapel - free her to progress quest A Strike from the Sky.
Prepare your team for a boss fight before exploring beyond Irabeth's room. Nulkineth, a mythic nabasu, waits just beyond. Defeating him will unlock your second Mythic Hero rank.
If you found the perfume in Nurah's tent (after Leper's Smile) and discovered her suspicious activities (during the gargoyle attack), after killing Nulkineth you can speak to her back in her tent to discover that she's spying for the demons. If you pick the Trickster dialogue option, you can recruit her to cause chaos for your benefit. Nurah's help will come in handy more than once, even as late as Act 5 (see Banner over the Citadel and Cascade of Fire).
The foothills of the mountain (down the mountainside from the chapel graveyard) become accessible after defeating Nulkineth. This area is optional, but you will find the Altar of Desna here for the Voice from Your Dreams achievement, as well as many tougher enemies including another nabasu, so come prepared.
Altar of Desna Walkthrough
- To complete the second half of the Voice from Your Dreams achievement and enable you to be able to recruit Arueshalae early during the siege of Drezen, you must play the song of Elysium at the Altar of Desna located at the southern edge of the map. The southern edge of the Lost Chapel can be reached by completing one of several skill checks along the main path to descend the mountain.
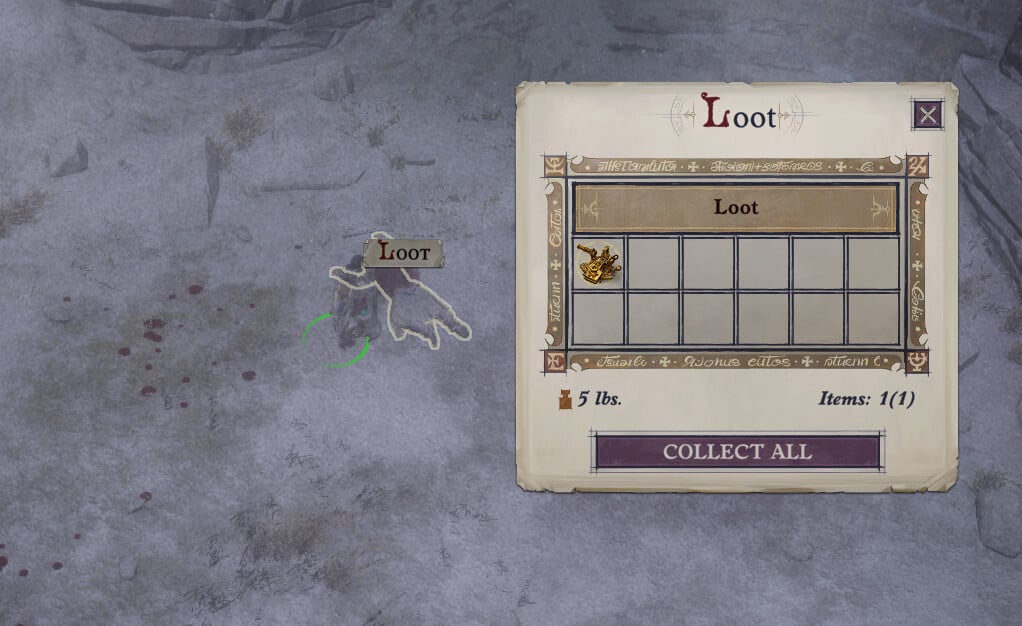
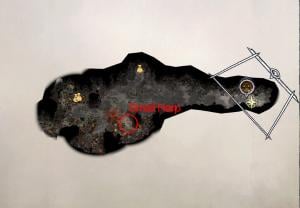
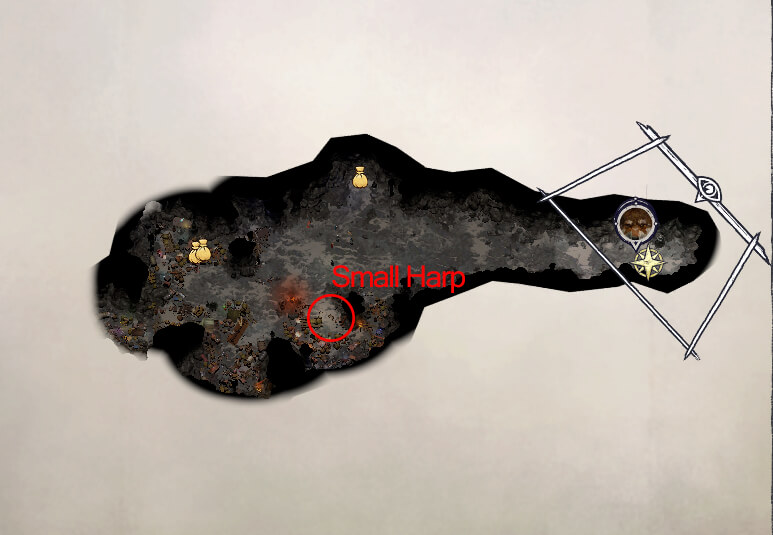
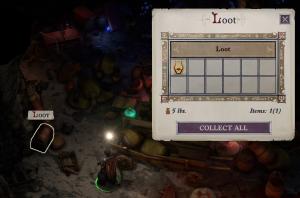
- The song requires three items, one of which is already at the altar. You will need to find the Small Sextant, which is northeast of the altar, and the Small Harp, which is in a cave in the northeast corner of the map.
- Once you have acquired both the Small Sextant and the Small Harp, return to the altar and place both items in the altar's inventory, along with the Map of Unknown Lands, which should already be in the altar's inventory.
- With all three items in the altar, you are now ready to play the song of Elysium. The correct order to play the instruments in is the Middle, Right, Left, and Middle again.
- After the scene, open the altar's inventory again to find a Throwing Axe of Silence along with the items you've previously placed.
-
Item / Altar Locations


-
Small Sextant

-
Small Harp Cave Location
-
Small Harp

-
Altar of Desna

Quests related to Lost Chapel
Lost Chapel Maps

Lost Chapel Notes & Tips
- There was previously an Elven Note in the chapel basement, but it was removed in a patch.
- You can use the church to cleanse your corruption if you need additional rests. This mechanic will return again in other maps.
- Use difficult terrain or spells like Web or Grease to deal with the golems. Then pick them off at range.
- The Kabriri Cultists have low Reflex saves. Drop them in a pit and deal with the other enemies first. Otherwise their spells can be absolutely devastating.
- For whatever reason, the door to the chapel boss fight can consistently trap your party. Make sure they are fully through before the scene starts. For ranged characters this is only a minor obstacle, so having your ranged and supports in the back will be fine. Just prepare to form a cuddle puddle near the door if necessary.
 Anonymous
If you have trouble with Zacharius, sneak past him by hugging the left wall of the passageway and continue to explore. Death Ward will be helpful here since there are spectres. Eventually you will find a couple scrolls of Undeath to Death, which he is unlikely to save against and by themselves do nearly enough damage to kill him from full health.
- Anonymous
PSA for anyone on this wiki for advice to get through the game easier. The Duality of Conjuring and Summoning item you can get in the library of the basement is extremely good and can be a major help with the difficult side bosses scattered throughout the game, because 99% of the main bosses are not difficult enough to warrant wasting its daily use. Put it on a good-aligned character (important because if you put it on an evil character you get a worse summon) and have them summon 2-3 nabasu on top of whatever you're fighting. They have a pretty thick HP pool, drain levels, and use touch attacks so the AC of the tankiest enemies is mostly ignored, and since they are a summon you can drop them right on top of an enemy and reliably draw their agro.
Make sure to pick up this item if you want to have an easier go of things. Easily worth dealing with the lich fight even if it was the only thing in the area as a reward.
- Anonymous
HOW exactly do I GET TO this location from the world map? There are too many blocked squiggles that don't actually tell me the direction I am suppose to take to even get to this place - and I have to get here before I can find Dresen. I REALLY wish Owlcat would bugger off with anything even remotely resembling a time limit if they're going to keep obsfuscating things like this. IF I can't see 90% of the map, it's NOT a map.
- Anonymous
Here's a tip that may help if you're having problems killing the lich. Drop the wand by the door, then walk 5/6 of your party members right up next to him. After that have the sixth go get the wand and walk up to trigger the conversation. Starting the fight in melee with him made it effortless for me.
- Anonymous
Zacharius is easily cheesed with Reflex-based disables such as Grease or Trip.
Seriously, if you have a wolf, just put Trip on autocast and Zacharius will spend like 90% of the fight getting off the ground.
- Anonymous
- Anonymous
ou can use the church to cleanse your corruption if you need additional rests - DOESNT WORK!
0
+11
-1